
Lens and framing
Frame a doorway or shared space
The 2.8 mm lens covers 88.2° horizontally and records up to 1920 × 1080. Adjust the aim inside the dome by hand during installation to centre the part of the scene you want to monitor.
Checking which support options are available…
Who would you like help from?
Enter your name to begin your live chat with an online consultant.
What can we help you with?
Your details are used only to respond. MatzoBot requests are securely passed to the MatzoTech team.
Your request has been emailed to MatzoTech. A consultant will reply using the email address or mobile number you supplied.

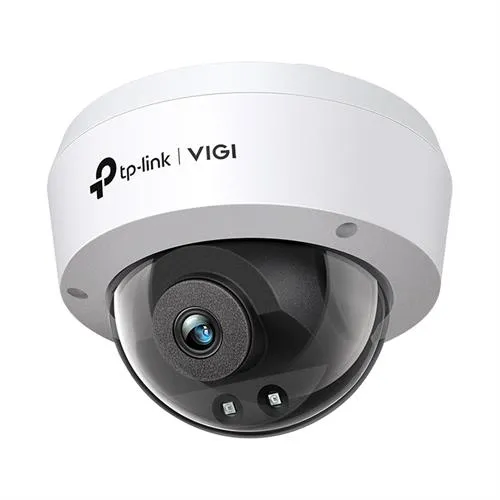
TP-Link VIGI C220I 2 MP infrared dome camera with a 2.8 mm lens, 30 m rated IR and PoE. IP67 and IK10 rated. Retail box with a 1-year warranty.
R769.00
Supplier has stock — 1 avail
Clear fulfilment, warranty and payment details.
Official manufacturer overview
TP-Link Global Support · Family setup guide linked by TP-Link for the VIGI C220I. It demonstrates the VIGI C240I as the example. Follow the VIGI C220I installation guide for model-specific parts and steps.
Play to load this video from YouTube.
TP-Link VIGI C220I
The 2 MP VIGI C220I combines a fixed 2.8 mm lens with infrared night vision inside an impact-resistant dome. It connects over Ethernet and can receive power through the same cable.
Lens and framing
The 2.8 mm lens covers 88.2° horizontally and records up to 1920 × 1080. Adjust the aim inside the dome by hand during installation to centre the part of the scene you want to monitor.
Infrared imaging
Two infrared LEDs light the scene for night viewing, with a manufacturer-rated range of up to 30 m. Digital wide dynamic range and 3D noise reduction help balance bright and dark areas and reduce image noise.
Events and enclosure
Motion, line-crossing and intrusion alerts can be combined with human and vehicle classification. The IP67 and IK10 ratings cover dust and water ingress and resistance to impacts under the applicable tests.
Wired installation
Connect the camera to a compatible PoE switch, injector or PoE recorder. The VIGI app, VIGI Security Manager and a compatible VIGI recorder provide setup and viewing options.
Install the supplied waterproof Ethernet fittings where required. Match the hardware version on the camera label before selecting firmware or an installation guide.
| Manufacturer | TP-Link VIGI |
|---|---|
| Model | VIGI C220I |
| Camera type | Wired infrared dome network camera |
| Image sensor | 1/3-inch progressive-scan CMOS |
| Fixed lens | 2.8 mm, f/2.2, M12 mount |
| Field of view (H × V × D) | 88.2° × 48.7° × 106.5° |
| Manual aim | Pan 0–355°, tilt 0–75° |
| Maximum resolution | 1920 × 1080 (2 MP) |
|---|---|
| Main stream rate | Up to 25 fps at 50 Hz or 30 fps at 60 Hz. Rotation by 90° or 270° limits the stream to 20 fps. |
| Main stream codecs | H.265+, H.265, H.264+ and H.264 |
| Substream codecs | H.265 and H.264 |
| Infrared | Two 850 nm LEDs, rated up to 30 m |
| Image controls | Digital wide dynamic range, 3D noise reduction and Smart IR |
| Built-in audio | No microphone or speaker |
| Recording storage | Use a compatible network recorder or recording software |
| Ethernet | One 10/100 Mb/s RJ45 port |
|---|---|
| Power | PoE (IEEE 802.3af/at, class 0) |
| Interoperability | ONVIF and RTSP |
| Management | VIGI app, VIGI Security Manager and VIGI NVR |
| Ingress and impact protection | IP67 and IK10 |
| Operating temperature | −30 to 60 °C |
| Dimensions (W × D × H) | 115 × 115 × 86 mm |
| Packaging | Retail box |
|---|---|
| Warranty | 1 year |
Install the supplied waterproof Ethernet fittings where required. Match the hardware version on the camera label before selecting firmware or an installation guide.
Use official support resources for this product. Each link opens in a new tab.
Open TP-Link South Africa’s support page for this camera. Match the hardware version printed on the unit or its box before selecting installation guides, firmware or software.
Open official support (opens in a new tab)Help other shoppers by sharing an honest review.
Write a reviewYou are offline. Reconnect to check prices and shop.

Reviews
There are no reviews yet.